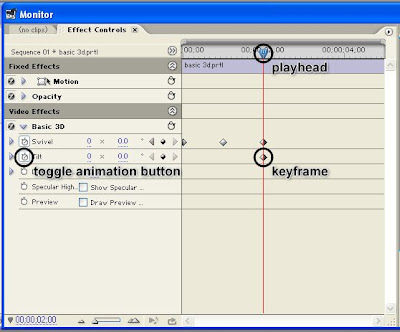
Make sure that the clip on the Timeline is still selected. Then go the the Effect Controls window and position the playhead on the same point as the third keyframe of the Swivel property. Then click on the Toggle Animation button beside the word Tilt to turn on keyframing for the Tilt property. Leave the Tilt values on this keyframe at 0 x 0.0.

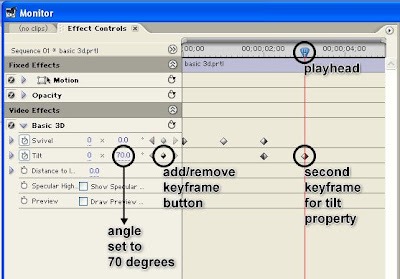
Then move the playhead forward by about 1 second and add another keyframe. On this keyframe, change the angle value to 70.

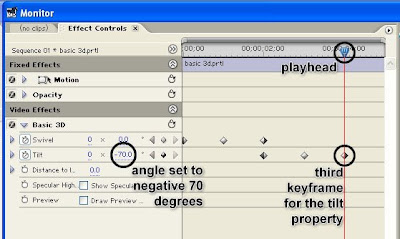
Move the playhead forward again by about 1 second and add another keyframe. Let's make the text rotate vertically towards the opposite direction. In the previous keyframe, the angle was set to 70 degrees. If we input a lower value on this next keyframe, the clip will rotate towards the opposite direction. We can even input a negative value. So let's go ahead and do that. On this new keyframe, change the angle to -70. This will result in the text rotating in the opposite direction starting from the previous keyframe.

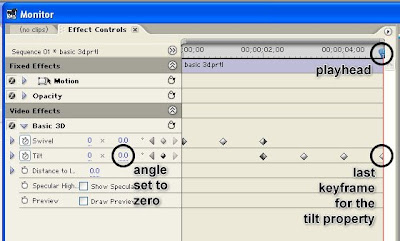
Let's add one last keyframe for the Tilt property. Position the playhead on the rightmost edge of the clip's timeline and add a keyframe. On this keyframe, change the tilt angle value back to zero.

At this point, when you watch your sequence on the program monitor, you should have something like this:
go back to Working with Adobe Premiere Pro's Basic 3D Video Effect PART 2
continue to Working with Adobe Premiere Pro's Basic 3D Video Effect PART 4
No comments:
Post a Comment